 |
 |
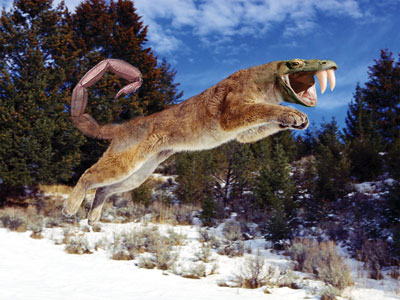 |
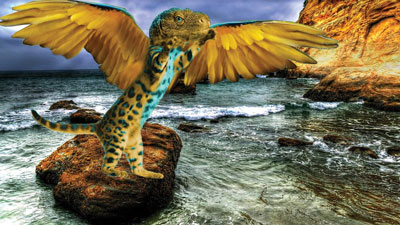
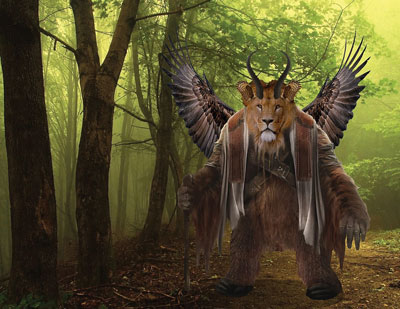
| Top to bottom: Color Changeling. The Guardian. Scorpuma. |
Preparation
Start by brainstorming with your students. We show ours images from some of the games mentioned above. Many websites have random creature generators that students can look at for inspiration. Once students find an inspiration for their creatures, have them brainstorm which real animal parts could make up their creatures. For example, a centaur is a human and a horse, but you could add other parts such as horns or wings.
Have students collect digital images for a main body, plus at least two parts they want to replace or add, such as heads, tails, or wings. Creative Commons is a good source to find free usable images for these. Putting the creature on a new background requires a few more skills, so you might want to save this for a future lesson. (Maybe the centaur lives in a Roman colosseum.) Make sure the images are high quality. The objective is to convince the viewer that these creatures exist.
Programs and Requirements
Photoshop has great tools for cutting out images, but we’ve also done this lesson using free raster graphics editing software. Before starting, discuss how the animals should fit together. Here are the key requirements:
- Different body parts should matchdirection. So, a side shot of a body fits a side shot of a head or tail.
- You can mix textures, but similar textures are easier to blend. Wet animals, such as dolphins, are hard to match with anything that is not wet.
- You must have overlapping textures. Even if you’re just adding a head, you’ll want the neck and part of the torso to overlap the main body. Blending subtracts part of the original, so too much is not a problem, while too little is catastrophic.
- Color and direction can be changed to match.
We use a tutorial to teach the core skills. Just create a low-resolution image document with two or three animal parts to blend together, and have students download it from something such as your school’s online file-sharing portal. Then you can teach them the basic skills as a class before they start their own projects. This will also help them to pick images that work together.
Tools and Techniques
There are a lot of tools in this lesson, but video tutorials for specific tools are easy to find on YouTube. The core tools for this lesson are the Move Tool, selection tools (Lasso, Quick Selection, and Magic Wand), Clone Stamp, and the Layer Mask.
- The Clone Stamp allows you to build up textures or make highly specific areas (like a face) a generic texture. Use this tool with a soft, round brush at 100% opacity.
- The Layer Mask will allow you to gradually erase the texture on one layer to smoothly blend it with the texture on another layer. Use a soft, round brush at 30% opacity.
Students can move, resize, and overlap shapes to build their creatures. We suggest having students turn in a rough draft before getting into detailed selections and blending. Let them move forward after you have checked to be sure their creature will work.
 |
 |
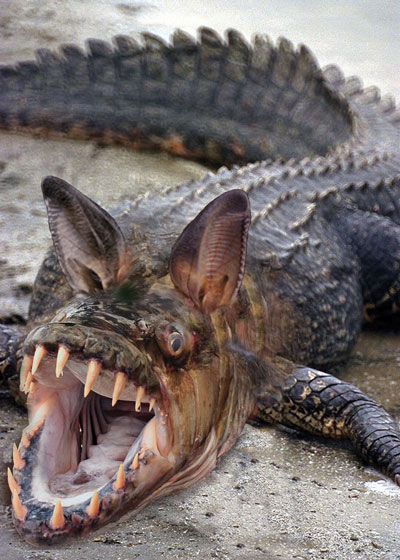 |
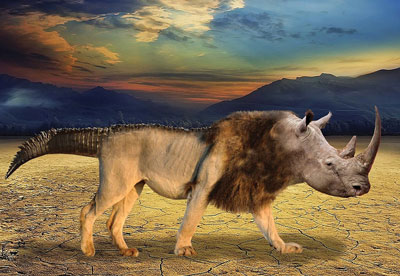
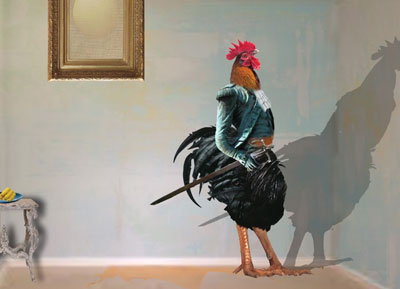
| Top to bottom: Rhinocodile. The Gentleman’s Rooster, grade twelve. Allicuda. |
More Advanced Techniques
This project provides a lot of opportunity for growth, depending on your time frame and students’ skills. Here are more options you can add:
- Adding creatures to a new environment. Requires cast shadows, integrating science for matching creatures and ecosystems.
- Changing the pose of a creature. Requires use of the Liquify Filter and the Warp or Puppet Warp transform edits.
- Changing skin textures and special effects (e.g., scales, breathing fire). These often require the tools for changing poses plus layer modes. These techniques are advanced, but provide stretch for ambitious students.
- Adding narrative. This seems to be difficult for most students, but you can have them create a story with modified creatures or backgrounds. Students can also work collaboratively on these.
Thoughts and Possibilities
One of the great things about this project is its adaptability—you can start as simply as blending one or two creatures together (like a centaur, griffon, or Minotaur), or create highly complex narrative scenes with constructed creatures, environments, and narratives.
Students can take inspiration from mythology, fantasy, and sci-fi, create their own creatures, or even make themselves into superheroes, Jedis, or wizards. If desired, lessons could be tied into mythology and science (e.g., create a creature that could live in the environment of __.)
Using the outline above, find a tutorial that will teach you how to implement the tools you’re ready for and go from there. Don’t try to teach everything on your first try. Have fun!
Craig Huffman and Matt Young teach art at Pickerington Central High School, in Pickerington, Ohio. craig_huffman@plsd. us, matt_young@pisd.us
NATIONAL STANDARD
Producing: Develop and refine artistic techniques and work for presentation.
WEB LINK
Pickerington Central High School Art Department: campus.digication.com/ phscart/welcome/published
View this article in the digital edition.