|
 |
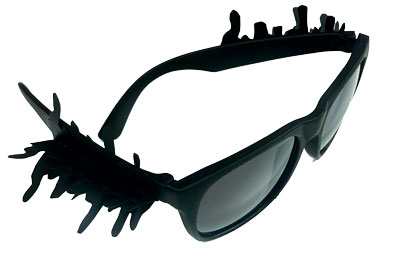 |
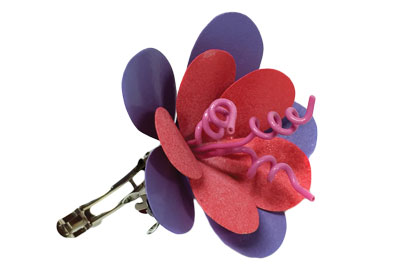
| A paper jewelry prototype. Anushri, flower barrette. Embellished sunglasses.; |
Discussion and Drawing
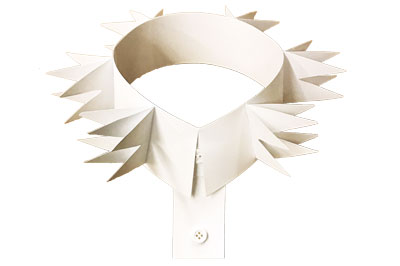
I began by asking students, “What is a fashion accessory?” and “What does it need to do?” We discussed how Butler’s work breaks the mold for both male and female accessories. (I chose Butler, but you may find another designer who will have a similar impact.)
Next, students drew five symmetrical shapes and five asymmetrical shapes in their sketchbooks, then created a series of small paper prototypes based on their sketches. These prototypes are intended to spark ideas of what form their fashion accessories might take when they begin working with styrene sheets for their final product. Styrene is a thin plastic that can be cut with a normal pair of scissors.
Procedures for Prototyping
After I explained the importance of making a prototype before moving into a final design, students used their sketches to build paper prototypes. Each student will need ten sheets of paper to make five prototypes (two sheets per prototype).
- Pick one symmetrical or asymmetrical sketch and draw a straight line down the middle of the shape. The line drawn will represent the fold line on the prototype.
- Fold one of the 3 x 3" pieces of paper in half. Keeping it folded, turn the paper so the fold is on the right. On the 3 x 3" paper, draw the line from the fold exactly as it is on the sketch. Cut on the line drawn while the paper is folded, not on the fold. Students should have one symmetrical shape once it is unfolded. Unfold and repeat on another 3 x 3" paper. The same line just drawn can be traced or a different line used if an asymmetrical prototype is desired.
- Keep both papers folded, apply a small amount of rubber cement on both folded sides, and stick the folded sides together. Make at least five different prototypes.
- Encourage students to interact with their prototypes. Have them hold them up to their ears, neck, hair, wrists, etc. Mirrors are useful for this stage.
Choosing a Function
Students next decide what their accessory will be. Will it be a head, ear, eye, nose, mouth, neck, chest, arm, wrist, or finger accessory? The paper prototype is intended to spark ideas and does not have to be used for students’ final designs, which also may be twoor three-dimensional.
 |
 |
 |
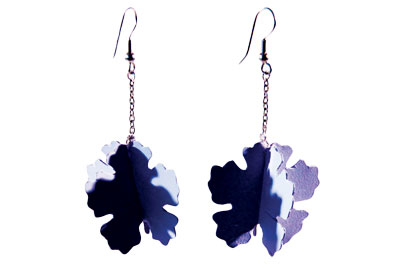
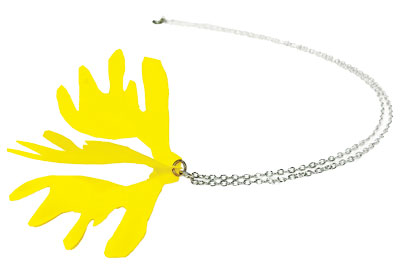
| Rachel, necklace. AA functional pair of earrings made from styrene. A functional student made neckpiece. |
Working with Styrene
Once designs are selected, introduce the material that students will use for their final products. Styrene is available in different thicknesses. Students need to decide which thickness makes sense for their accessory based on how they interact with it. Students draw out their shapes onto the styrene sheets, drawing only half of the shape as it looked folded. Unlike the paper prototype, the two sides will need to be glued together, not folded. Students can cut out the shapes with scissors and glue the pieces together. Rubber cement works well for this, but you can also use super glue. Regardless, I add a small drop of fastdrying super glue for extra strength after using the cement. Small pieces of masking tape can be used to hold pieces together until the glue is dry.
Sanding and Painting
Light sanding with a super-fine grade sandpaper may be needed if super glue drips occur. The styrene may be left white or painted. We use high-quality water-based spray paint to add color because of its low odor. Some accessories may require other materials that either I supply or students bring from home, such as jump rings, earring hooks, wire, fabric, or found objects.
Extensions
To expand this lesson, you could introduce a fashion photography component to have students model their finished accessories. They could also use their pieces as part of a still life or to be photographed and then manipulated in Photoshop. Have fun with it! Your students certainly will.
Aaron Kuehne is an art teacher at Detroit Country Day Middle School, in Beverly Hills, Michigan. akuehne@dcds.edu
NATIONAL STANDARD
Connecting: Relating artistic ideas and work with personal meaning and external context.
WEB LINK
Fred Butler: fredbutlerstyle.com
View this article in the digital edition.